First steps
The easiest way to test Mixer and find out what you can do with it is by using two Blender instances side by side on the same machine.
Start two Blender instances, lay them side by side. In each one, open the Mixer panel in the 3D editor.
Create a Server
On one of the Blender (say the left one), click on the Connect button.

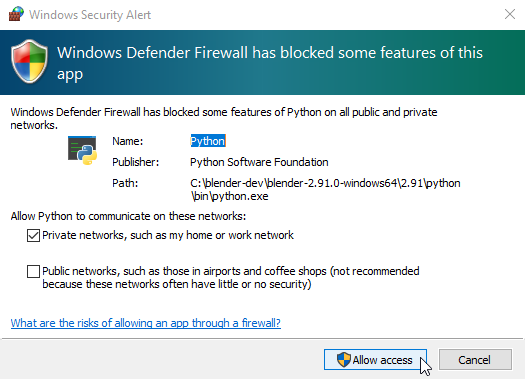
If you are using Windows, the firewall will likely prompt you to allow access for Python.
Warning
Make sure to check Private networks and click on Allow access.
This launches a Mixer server in the background. After the server is started and Mixer is connected to the server, the panel changes.
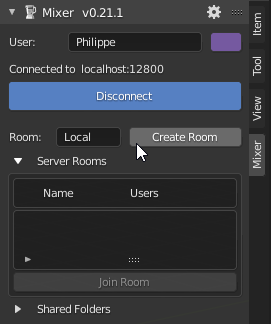
Now click on Create Room to create a room. After the room is created, the Server rooms section of the Mixer panel displays the room name, which is Local in the picture below.
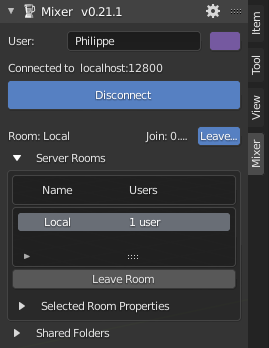
This Blender is connected to the server, which is now ready to accept a connection from a new client.
Connect to a Server
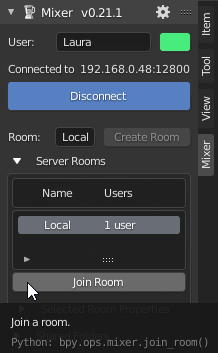
On the other Blender (say the right one), open the Mixer panel and click on the Connect button.
This connects Mixer to the server we have just setup before. The Server Rooms section lists the room name.
Warning
Joining a room wipes out your current data and replaces it with the data from the Mixer server.
Click on Join room. Both Blender are now connected to the server and their data is synchronized. Creating or moving an object in one Blender updates the object in the other Blender.
Read more about Mixer features and try by yourself.